Automated deployment of Hugo generated site to Github pages
 Image credit: Unsplash
In the last post, I listed the typical workflow of generating a static website with Hugo. Here I would like to share the issues I encountered and the tweaks I’ve made. The source codes for this site can be found here.
Basic setting in my config.toml for the Academic Theme
Many beautifully designed themes are already available. I decided to use the academic theme, because it’s specifically designed for academic uses, showcasing publications, personal profile, and projects. For more details, please see the demo website in action.
In config.toml, one can set the universal variables used by Hugo to generate HTML pages. For example:
baseurl = "https://fischcheng.github.io/"
title = "Yu Cheng"
copyright = "© 2016 Yu Cheng"
languageCode = "en-us"
theme = "hugo-academic"
Also some specific parameters used by the chosen theme:
[params.about]
    interests = ["Largescale ocean circulation", "climate variability and modeling"]
    str_interests = "Interests"
    str_education = "Education"

[[params.about.education]]
      course = "BSc in Atmospheric Sciences"
      institution = "National Taiwan University"
      year = 2010
In the academic theme, there are 7 sections on the homepage. The about and teaching sections are under content/home. The content of personal profile is from about.md, yet the entries in interests and education are configured in config.toml.
Three other types of contents are publication, post and project. Each has its unique page layouts, stored under corresponding folders under content. Add a line selected = true in the meta-data part in the publication entry to ensure that entry displayed in the selected publication section.
Next change following items to customize the navigation bar:
[[menu.main]]
  name = "Home"
  url = "#top"
  weight = 1

[[menu.main]]
  name = "Publications"
  url = "#publications"
  weight = 2

[[menu.main]]
  name = "Posts"
  url = "#posts"
  weight = 3

[[menu.main]]
  name = "Research"
  url = "#projects"
  weight = 4

[[menu.main]]
  name = "Works"
  url = "#works"
  weight = 5

[[menu.main]]
  name = "Contact"
  url = "#contact"
  weight = 6
Changing the name will tell Hugo to replace the navbar items and URL for the page that button linked to. I modified the default teaching.md page to works and renamed project section to research. Also, I enabled commenting by setting disqusShortname = "yucheng" in config.toml. And follow this snippet to add a new social network icon:
[[params.social]]
    icon = "envelope"  # icon name for email
    icon_pack = "fa"   # for font-awesome icons
    link = "mailto:username@xxx.xxx"
On top of the hugo-academic theme, I added an additional stylesheet under static/css. This changes the default color scheme from light blue to green. Besides, I changed the font of the navbar-brand, the title of my site by adding following lines:
.navbar-brand {
    text-transform: uppercase;
    font-weight: bold;
    font-size: 1.5em;
    color: #2b2b2b;
    font-family: 'Permanent Marker', cursive;
}
The contents within static/js and static/ccs will be included in the header.html after the default ccs stylesheets, so it’s totally possible to change color scheme without modifying anything in the themes/academic. However, to change fonts, I modified themes/academic/layouts/partials/header.html to load an additional font Permanent Marker from google fonts.
<link rel="stylesheet" href="//fonts.googleapis.com/css?family=Lato:400,700|Merriweather|Roboto+Mono|Permanent+Marker">
Github pages, user site or project site
Two kinds of site are supported on GitHub pages, the user/organization site, and the project site. For the former, the site itself is a repository, everything under master branch will be displayed under this address https://<username>.github.io, which is customizable. And the later is a website to showcase an existed repo. Without changing the original branch, everything under gh-pages branch can be accessed under http://<username>.github.io/<repository>. Github even provides an Automatic Generator to help to create a project site. More details can be found here.
My website is an user site. Under this repo fischcheng.github.io, the source branch archived all changes to the source codes, and master branch store the Hugo-generated HTML pages.
Automated deployment using Wercker
The default way to build a hugo site is simple, invoke hugo under the site root. A public folder will be created, containing every HTML pages and copied stylesheets and static files (banner images and profile icons or so). Push this folder to the master branch, and voila, the site is online.
What if a single push to the source branch (or whatever name of your development branch) can trigger all the rest steps? Travis-CI was my old choice for the last version of this site, until I came across this wonderful guide on Hugo’s official site. However, things changed a lot since that article was last edited and below I would like to detail all the issues I ran into and how I solved them.
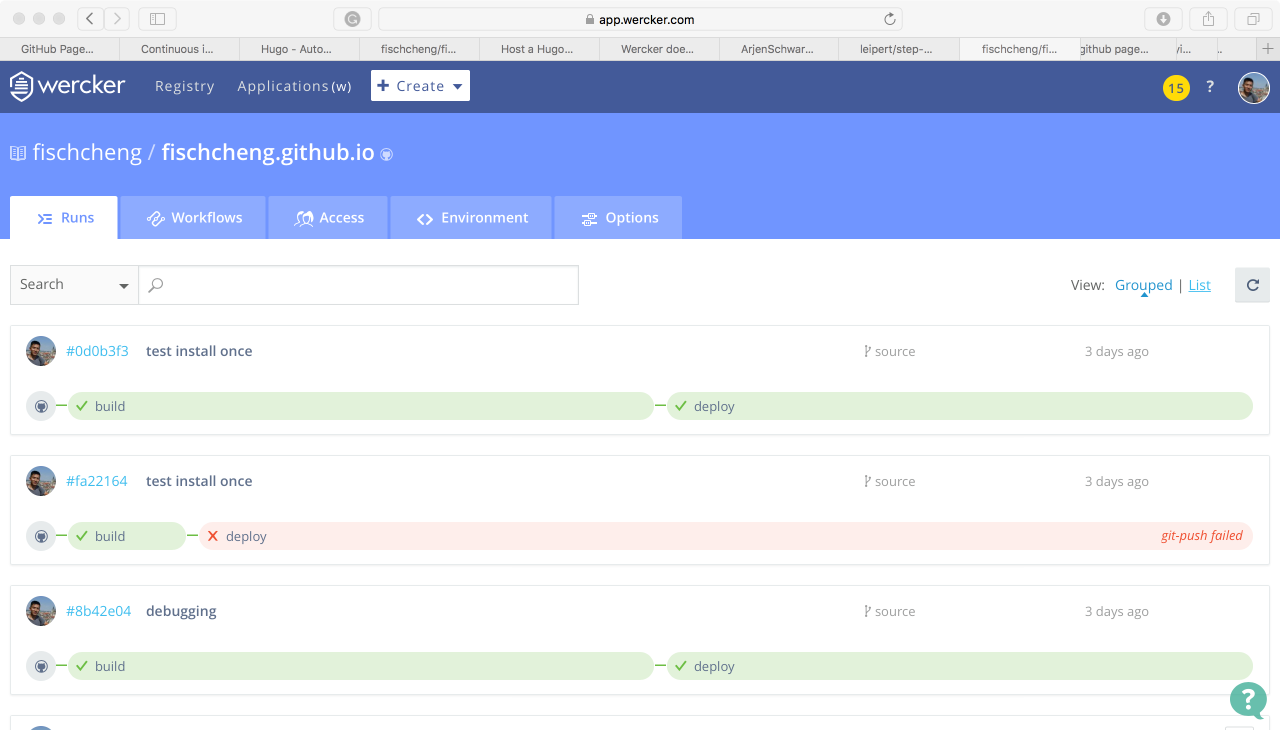
Wercker is a continuous integration (CI) tool that helps developers to build, test and deploy their applications based on Docker. A Wercker account can be easily hooked to a given Github or Bitbucket account, and one can create new applications from a chosen repository. After setting up, a push to the repository will automatically trigger the application. One of the biggest advantages of Wercker over Travis-CI is the collection of easily-located and well-documented steps. In our case, the application consists of two steps build hugo and deploy to GitHub.
The first task is to create the config.yml (link to mine) in the developing branch. Please follow the original Hugo guide to setup the link between a Wercker application to the Github. Below, I will only list out the discrepancies I encountered.
Build
Following the official guide, I used this step to trigger Hugo to build HTML pages. However, my first try didn’t successfully generate the pages correctly, because the arjen/hugo-build step couldn’t find the hugo-academic theme. For easier tracking and updating, I forked the hugo-academic repo, and I later realized that, for a repo embedded within another repo, the former is counted as a submodule. For the build step to work as desired, I had to install git and initialize submodule to ensure that the build step can locate the hugo-academic theme. Kudos to this post which helped me to track this issue down.
box: debian

build:
  steps:
    - script:
        name: install git
        code: |
            apt-get update
            apt-get install git -y
    - script:
        name: initialize git submodules
        code: |
            git submodule update --init --recursive
    - arjen/hugo-build@1.11.0:
        version: "0.15"
        theme: "hugo-academic"
        flags: --buildDrafts=true
Deploy
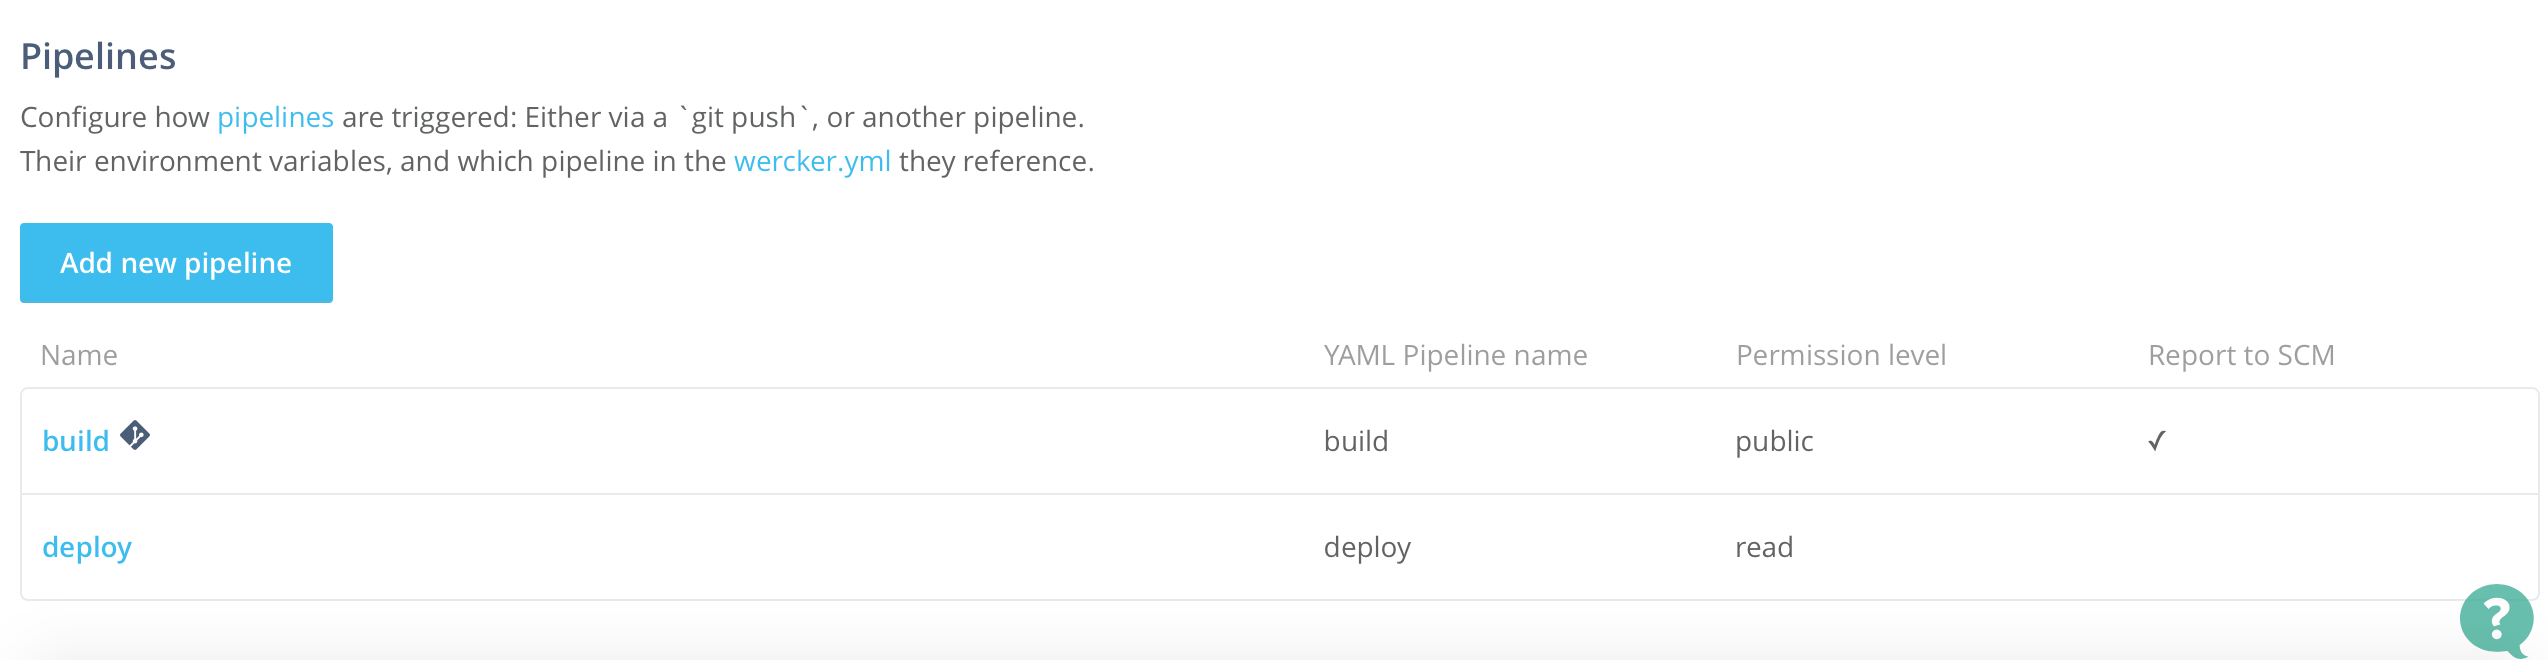
There is no more such thing as “Add deploy target” in Wercker. The interface has changed to the new “workflows of pipelines.” This change is so new that even the documentation on Wercker website has not changed yet. Their customer service still referred me to the old supporting materials.
So I poked around and realized that, even if the second deploy step is included in the wercker.yml, one still needs to manually add a new “pipeline” under the “workflow” tab. Upon creating a new pipeline, the “YML pipeline name” must be in the predefined names in the wercker.yml.
Here I used this step to deploy the built site to GitHub. Each pipeline starts from scratch. So for the deploy pipeline, the git package needs to be installed again. One also has to setup the environment variable $Git_Token, acquired from Github setting.
deploy:
    steps:
       - script:
          name: install git
          code: |
            apt-get update && apt-get install git -y
       - leipert/git-push@0.7.6:
            gh_oauth: $Git_Token
            gh_pages: true
            basedir: public
            branch: master
Yu Cheng 鄭嵎
Sustainability Data Scientist
Passionate about leveraging my past experience to make positive impacts on the planet. Well, raising two wonderful children heartfully is a good start.